

How to Style a Wig
Have you ever unboxed a wig, put it on, and realized that it didn't look as realistic as you thought it would? If the answer is yes, chances are your wig could use a bit of styling. Knowing how to style a wig enables you to make virtually any wig appear more natural. In this comprehensive guide, we'll share with you exactly how to style a wig to make it look like it's growing from your scalp. Once you know the basics, you'll be able to have fun with your wigs and create new beautiful hairstyles!
Top 10 Expert Wig Styling Tips to Style a Wig
If you wear a wig without styling it, you won't be taking full advantage of the versatility that wigs offer. Yet, many struggle when styling a wig and even damage their wigs in the process. Fortunately, with the right information, you'll be more than capable of styling your wig like a pro. Here are our top 10 expert wig styling tips!
- Use styling tools only after the wig is dry - Using styling tools on a wet wig can cause the wig to become warped or damaged. Always wait until it's dry, even if the wig is curly. The only exception to this suggestion is a blow-dryer, of course.
- Use a mannequin head if you are a beginner - Though many people style their wigs while they're on their heads, this is not mandatory. If you're new to wig styling, use a mannequin head or foam styling head to make the styling process easier.
- Use a wide-tooth comb to detangle your wig - Even human hair wigs require gentle handling, and brushing your wig with a fine-tooth comb could cause breakage and increased shedding. To limit negative consequences and damage to your wig, use a wide-toothed comb and a gentle hand.
- Use T-pins to secure your wig - When you place your wig on your mannequin stand, it may not fit securely and could move around as you prep and style your wig. To keep your wig secure, you should use T-pins to keep your wig in place.
- Only use products formulated for wigs - Wigs should not be treated just like your natural hair, even if they are made of human hair. They require specialized care, so you should only use products that are formulated specifically for wigs.
- Use a spray bottle to remove frizz and static electricity - Static and frizz set in when your wig is excessively dry. You can prevent or get rid of frizz and static by spraying the wig with water and massaging it into the strands.
- Accessorize your wig to enhance its beauty - Wigs are extremely versatile and can be accessorized with headbands, clips, scarves, and much more. Your wig styling possibilities are limited only by your imagination. So, if you're feeling bored with your wig, know that you have styling options to elevate your look.
- Use moderate heat for styling, and use heat protection - Many people abuse their wigs with high heat since it's not their natural hair, but this is a mistake. Regularly applying high heat to your wig or heat styling it without a heat protectant can burn your wig's strands just like it could your own.
- Always be gentle with your wig - One of the quickest ways to ruin a wig is by handling it roughly (ripping the lace, yanking out hairs, etc.). When you wash, dry, detangle, and style the wig, be careful not to pull excessively, overstretch the wig cap, or tear the lace.
- Air-dry your unit - Though blow-drying is not as harsh to the hair as heated tools, it can still cause excessive shedding and damage to the wig. So, whenever possible, we recommend that you air-dry instead of blow-dry.
Video Guides on How to Style a Wig
Having a video guide that takes you from start to finish is helpful and practical for learning how to style a wig. Here, we feature two step-by-step video guides from XRS Beauty influencers Dyamond Myne and Msnaturally Mary. They will help you understand how to style a wig in no time!
How to Install and Style a Straight Wig
In this video, Msnaturally Mary will show you how to melt and style one of our Clear Lace Clean Hairline straight lace front wigs. She does a 3-way lace comparison and shows and explains every step of the wig installation process. Furthermore, she shows you how to get the wig silky smooth and achieve a perfect lace melt for a natural-looking result.
How to Create a Voluminous Style on a Textured Wig
This video by Dyamond Myne demonstrates how to style and melt a textured lace front unit with our Clear Lace and Clean Hairline technology. She starts with a comparison between brown lace, transparent lace, and Clear Lace. After that, she installs the wig step-by-step. To finish things off, she creates large spiral curls and then combs through them to reveal bouncy, voluminous curls.
Products and Tools You Should Use to Style a Wig
- Wide-tooth comb
- Fine tooth comb
- A foam or canvas mannequin head for styling
- A wig drying stand
- A microfiber towel
- Wig shampoo for human hair wigs
- Wig conditioner for human hair wigs
- Leave-in conditioner for human hair wigs
- A spray bottle with water
- Styling mousse
- T-Pins
- Curling iron or curling wand (optional)
- Flat iron (optional)
- Curling iron (optional)
- Blow-dryer (optional)
- Alligator clips or elastic bands
- Holding spray
- Bobby pins
- Rubber bands
How to Create Waves in Your Wig

Adding waves to your wig makes it more voluminous and evokes an air of effortless flair. Luckily, once you get the hang of it, creating beachy waves will be quick and easy. Follow the below steps to create the perfect waves:
- Put your dry wig on your head and secure it with got2b Glued spray. If you'd rather style your wig on a mannequin head, you can do that too. Just place your wig on the mannequin head and then stick T-pins through the wig and canvas/styrofoam all around the perimeter of the wig.
- Spray a heat protectant all over the wig, as you'll be applying heat to it in subsequent steps. Comb the heat protectant through the hair for even distribution. Follow the instructions on your heat protectant's packaging for the best results.
- Turn your curling wand on and set it to medium heat (between 200 and 300 degrees Fahrenheit). You shouldn't use high heat because that could reduce the life of the wig by damaging the hair.
- While the curling wand is heating up, part your wig into 4 equal sections to make it more manageable. Use alligator clips or elastics to secure 3 of the sections out of the way.
- Starting with one of the back sections, part out a 1-inch section of hair and comb through it with a fine-tooth comb.
- Hold the curling wand about an inch away from the root of the section you just parted.
- Begin wrapping the section of hair around the curling wand until there's no more hair left to wrap. Be careful, as the curling wand will be extremely hot.
- Wait about 5 to 10 seconds, and then pull the curling wand upward.
- Hold the curl in your hand while it's still intact and spray it very lightly with your holding spray.
- Let the curl fall, and then run your comb through it once to release the curl.
- Repeat steps 5-10 for the rest of the wig.
How to Curl Your Wigs

Curling your wig is a great way to add personality to straight wigs or enhance the curl pattern of textured wigs. Here are some step-by-step instructions for curling your wigs:
- Put your wig on your head and secure it with your choice of lace adhesive. Or, if you're a beginner, put it on a mannequin head and use T-pins around the front, sides, and back of the wig to secure.
- Apply your heat protectant and comb it through with a wide-toothed comb to aid in distribution. Follow the instructions on the product packaging.
- Turn on your curling iron and set it to medium heat - no higher than 300 degrees Fahrenheit.
- As you wait for the curling iron to reach the set temperature, use your wide-toothed comb to separate the wig into 4 or more sections. Secure all of the sections with elastic bands or alligator clips to keep them out of the way.
- Part out a 1-inch section of hair from one of the back sections and comb it through with a fine-toothed comb.
- Holding the curling wand perpendicular to the section of hair, clamp it down on the section. It should be clamped down about a half-inch away from the roots.
- Pull the curling iron downward until it's about a half-inch away from the ends of the hair.
- Turn the curling iron until it’s an inch away from the roots. Hold it there for about 10 seconds.
- Untwirl the curling iron and hold the curl in your hand until it's cool, and then release it. Don't comb through it.
- Repeat steps 5-9 for the rest of the wig, and then lightly spray your hair with holding spray to lock in the style.
How to Straighten Your Wigs

Curly wigs are super versatile since you can straighten them and rock a whole new look. And even when you buy a straight wig, you may find that it needs a bit more straightening to make it look sleek and shiny. So, it's important to know how to straighten your wigs. Follow the below instructions to straighten your wigs like a pro:
- Put your wig on your head and secure it with lace adhesive or put it on a mannequin head and use T-pins to secure the wig's perimeter.
- Spray the wig down with a heat protectant and comb it through with a wide-toothed comb.
- Turn on your flat iron and set it to a max of 350 degrees Fahrenheit. Using a flat iron with a high temperature may damage the hair.
- Separate your hair into 4 to 6 sections and secure each with an elastic or alligator clip.
- From a back section of hair, part off a ½ -inch section and detangle it with a fine-tooth comb. You can make the section larger if you're short on time, but you may need to increase the flat iron temperature to get it bone straight.
- Clamp the flat iron onto the section as close to the roots as possible without touching the base of the wefts, wig cap, or the lace.
- Pull the flat iron down continuously until the entire section of hair has been straightened.
- Repeat steps 5 to 7 for all of the rest of the hair.
Before You Style Your Wig
You know how to style your wig, but we'd be remiss if we didn't inform you of the importance of prepping your wig before styling. Below, we'll tell you what you need to do before styling your wig.
Wash Your Wig
The first step you should take when you get a new wig is to wash it. During the manufacturing process, the wig could have come in contact with chemicals and debris that leave behind an unpleasant smell. Washing the wig thoroughly before styling it will neutralize the smell and remove any dirt or chemicals that remain.
Detangle Your wig
Detangling your wig is also extremely important prior to styling it. It will make the styling process quicker and easier and reduce the amount of shedding you could experience from rough handling due to excessive tangles.
Dry Your Wig
It's best to style dry hair, as it helps to protect the integrity of the wig construction. You have two options to dry your wig, and they are as follows:
- Air Dry - Set your wig on a drying rack after washing it.
- Blow Dry - When you don't have time to allow your wig to air dry, you can blow dry it. Here's how to do so without damaging your unit:
- Wrap the wig in a microfiber towel and squeeze it gently to get rid of the excess moisture.
- Put the wig on a mannequin head and secure it with T-pins around the perimeter.
- Comb through the unit with a wide-tooth comb to get rid of tangles.
- Turn on your blow dryer and put it on the lowest heat setting that you can ("cool" is the best). If you'll be using any amount of heat, you should apply a heat protectant first.
- Point the blow dryer about 4 inches away from the wig and begin drying it from roots to ends. If your wig is dense, you can section the wig into 4 or more sections and blow-dry each section individually.
Human Hair Wigs and Synthetic Wigs Differences
Human hair wigs are, of course, the highest quality wigs that you can buy. Regardless of the style, they look natural. In addition, they are very versatile, since you can style them however you prefer with any heat tool you wish. Nevertheless, you should be careful not to over-style your human hair wigs as doing so can cause damage.
Synthetic wigs, on the other hand, have some limitations. For instance, most synthetic wigs cannot be heat-styled, which limits the styles you can create. They also don't hold up well in the long term with repeated styling.
Different Wigs Style Options
Wig structure greatly influences your style options. Check out the list below to learn about your style options for different types of wigs:
- Lace Front Wigs: Lace front wigs have lace only in the front and can be worn in styles like a low ponytail, curly or straight layers, or a low bun.
- 360 Lace Wigs: 360 lace wigs have lace around the perimeter of the wig, enabling you to wear your wig in styles like a high ponytail, high bun, or curls and waves.
- Full Lace Wigs: Full lace wigs have lace all throughout the wig, so your styling options are endless - put your wig in braids, braided updos, space buns, or any other style you can think of.
- Headband Wigs: Headband wigs have no lace at all, meaning you cannot part it anywhere; the most you can do with this wig type is wear it down or put it in a ponytail.
Have Some Fun
Here are some styles you can do in less than 5 minutes! Have fun!
For these styles, your wig should be on your head or attached to a mannequin head.
Low Ponytail

Make your part with a rat tail comb, add some styling mousse to the front of the wig, and brush all of the hair toward the back. Secure it with a hair tie and go!
High Ponytail

Put some styling mousse on the wig and brush all of the hair towards the crown of your head. Use a hair tie to secure. Works only with 360 lace or full lace wigs.
Dutch Braids
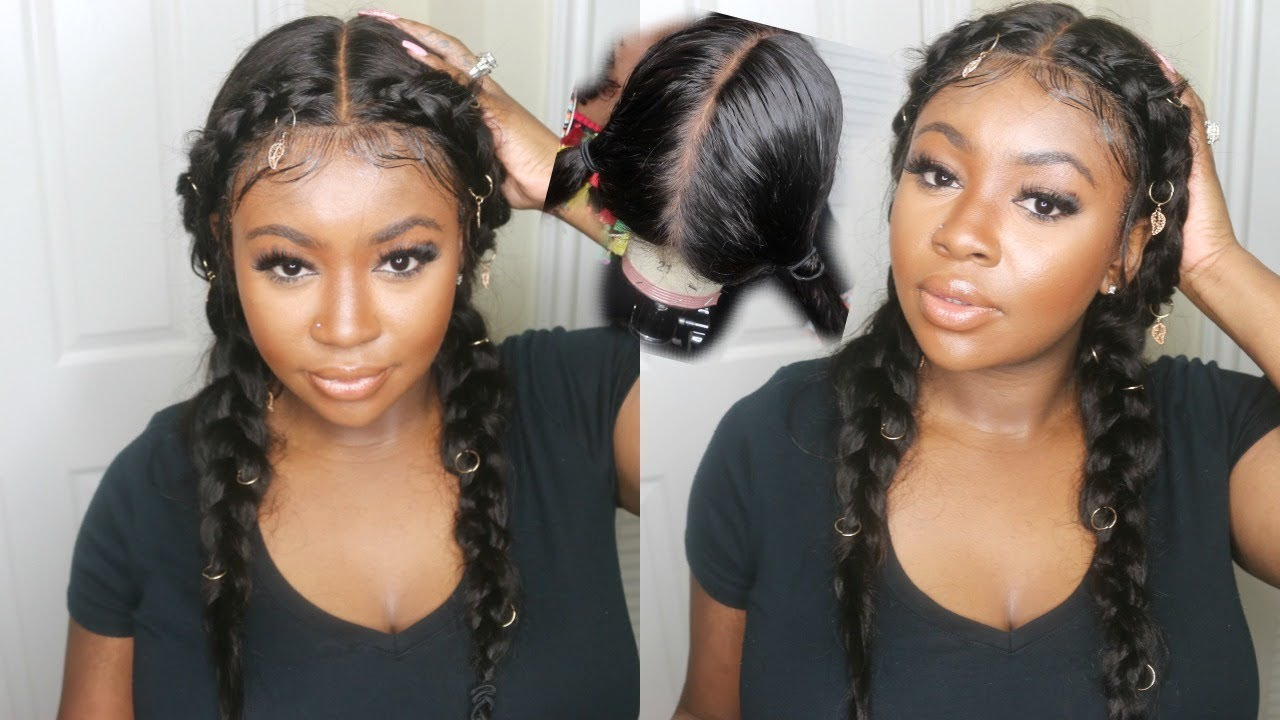
Part your wig in the middle from front to back, add mousse to each half, and create a French braid. Secure the ends of each French braid with a small rubber band. Jazz the style up with accessories if you'd like!
Space Buns

Part your hair down the middle from front to back, add mousse on both sides near the hairline, and brush the hair into two high side ponytails. Secure each with an elastic. Then wrap the leftover hair in each ponytail around itself until it forms a bun. Use bobby pins to hold the buns in place. Works only with full lace wigs.
Final Words
Styling your wig can be near impossible if you don't know where to start and how to complete each step. But with this guide, you'll be able to style your wigs without frustration and achieve natural styles that leave others no choice but to stare.
We'd love to see your best wig styles! Share a picture of how you style your wig on Instagram and tag us to get in on the fun!


Thx for your advice. I really enjoyed learning different avenues in styling and preserving my wigs.
Leave a comment