

16 Tips To Make Your Wig Look More Natural

The biggest obstacle associated with wig wearing is making your unit look real. We’re sure you agree. Thankfully, even though a high-quality lace wig can go a long way towards creating a natural look, you don’t need the most expensive wig to pull off a natural slay. A properly styled wig will be undetectable along the hairline - it’ll look so natural that others won’t be able to tell whether it’s growing from your scalp or not. Also, to make a wig look natural, you don’t need to be a pro; you’ve just got to know how to customize your unit. In this article, we’ll give you 16 pro tips to make your wig look more convincing.
Tip 1: Get a Human Hair Wig
No matter what material a synthetic wig is made of, it will never look as natural as a human hair wig. So, if you’re hoping to end up with a 100% natural look, you need to start with the best possible foundation: a human hair wig.
You can find human hair wigs literally everywhere, but they are not all created equal. Some are much better suited to a natural end result than others. The best Choice are Virgin and Remy Human Hair.
Tip 2: Choose Wig Lace that Melt Down
Some lace types are bulky and impossible to melt, so you’ll need to make sure that you choose specialized lace that will make the melting process easy. You have a few options to choose from:
HD lace - HD lace is one of the best lace types available for human hair wigs. It is a type of Swiss lace that’s ultra-thin and undetectable. With an HD lace wig, you’ll have no problem making your wig look like it’s growing from your scalp.
Clear lace - Clear Lace is the most undetectable lace type of them all. It is 100% clear and blends into all skin colors seamlessly for a flawless lace melt. You won’t find a more invisible lace anywhere.
Normal lace in your skin tone - Another option is to choose a wig with normal lace in your skin color. You have a few shades to choose from, including light brown, medium brown, dark brown, or transparent. Be very careful when selecting your lace color because if you choose the wrong one, it will be very difficult to melt.
Find out which lace works best for you
Tip 3: Measure Your Head, then Buy a Wig
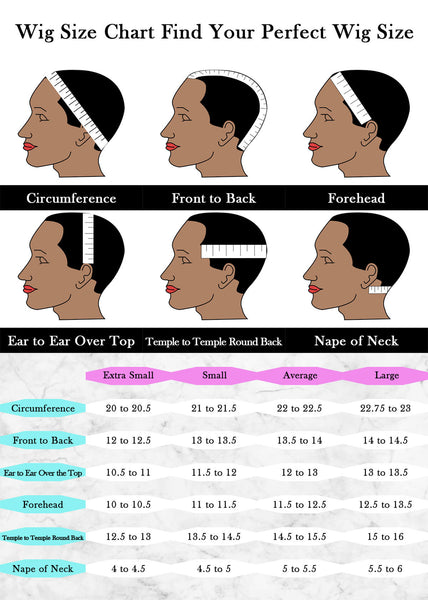
Measuring your head is the next step. Measuring your head for a wig can take a little bit of time, but it’s well worth it. If you buy a wig that’s too large or small for your head, you’ll find that getting it to blend or lie flat against your head will be a real challenge.
Here are the steps you need to follow to measure your head for a wig:
- Measure the circumference of your head - To do this, wrap a soft measuring tape around the center of your forehead, behind the tops of your ears, and position the back of the tape at the nape of your neck. Write the measurement down on a sheet of paper in inches. This is the most common measurement used for sizing wigs in the U.S.
- Measure the distance from the front of your head to the back of your head - Start measuring at one of your temples, wrap the tape around the back of your head (not the nape of your neck) and stop at the other temple.
- Measure the distance from ear to ear while pulling the measuring tape across the top of your head. Take note of that measurement.
- Measure across your forehead from ear to ear and record that measurement.
- Measure from the front of your hairline (in the middle) to the nape of your neck and write that number down.
- Measure the nape of your neck. Start just behind one of your ears, and pull the tape along your nape until you get to the other ear.
All of these measurements come in handy when you’re choosing your wig size. All you need to do is access your wig store’s size guide and plug in your measurements to find the right wig size. They range from extra small to large in most cases.
Find out your perfect wig size
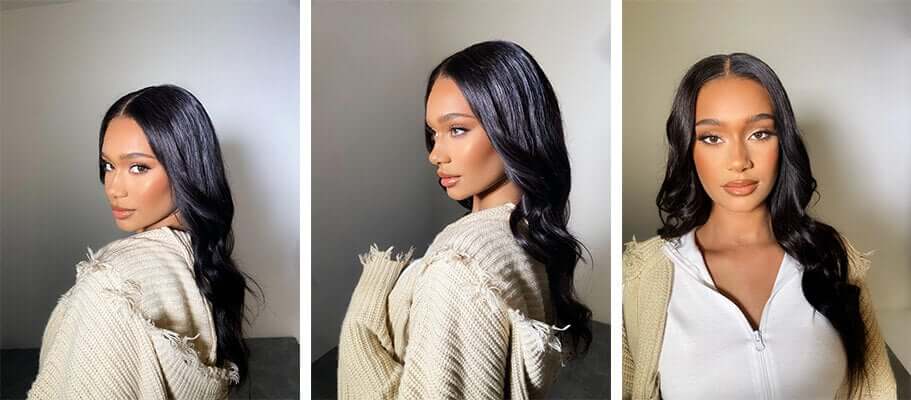
Tip 4: Choose the Right Style
Choosing the right wig style can make all the difference in making a wig appear natural. Not every hair texture, length, or density will look natural and flattering on you.
Here are some tips you can use to choose a great wig style:
- If you have an oval or heart-shaped face, wig styles like bobs and layered styles work well.
- If you have a long or angled face, go for long wigs with curls or waves.
- If you have a diamond-shaped face, most wig styles will look great on you. The possibilities are endless.
- Choose a wig with a density that’s similar to the density of your own hair.
- Choose a wig that comply with your lifestyle.
Ultimately, the style you choose is entirely up to you. If you’ve really been wanting to try a specific style and feel confident enough to try it out, feel free to do so!
Tip 5: Bleach the Wig Knots
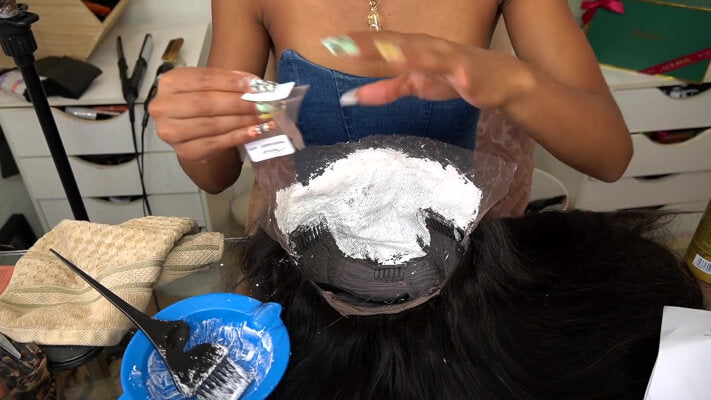
Bleaching wig knots is an essential step for most human hair wigs - that is, if your wig doesn't come with pre-bleached knots. When a wig has unbleached knots, the lace (on which the wig hair is attached) will be covered in little black dots that make the unit look fake. Bleaching the knots makes them less visible. The result? Lace that better blends into your skin.
To bleach your wig's knots, you'll need to apply bleach to the underside of the lace and allow it to process until the knots are no longer visible.
For step-by-step instructions on how to bleach your wig's knots, read our bleaching knots guide.
Tip 6: Pluck the Hairline
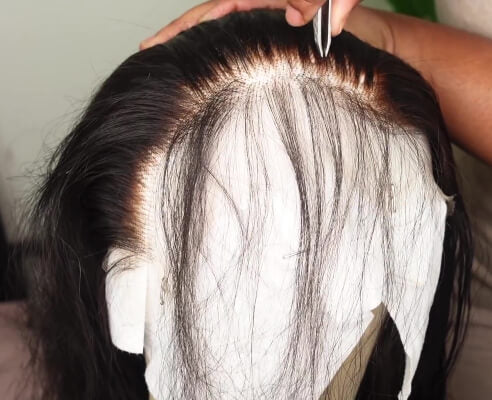
Plucking the hairline of a wig is another way to make it look more natural. The average wig has a hairline that goes straight across or is unnaturally thick. To reduce the thickness to a more natural level and shape the hairline to look more like your own, plucking is necessary.
To pluck the hairline of your wig, you'll take pictures of your hairline and then use tweezers to pluck the hairline of the wig to match. Afterward, you'll need to use a rat tail comb and tweezers to pluck the hair in layers - the process is a bit intricate.
Read our guide on How to Pluck a Wig to learn how to pluck your wig from start to finish!
Tip 7: Bald Cap Method: Braid Your Hair Flat
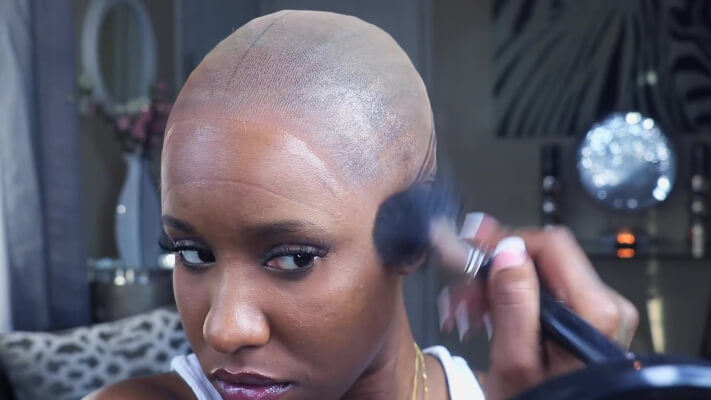
In order for a wig to look natural, it's got to lay flat against your head. The bald cap method is a popular way to create a smooth surface for your wig to lay upon. Without a bald cap, your wig could sit up too high, giving away the fact that it's not real. All you need is braiding skills, a nylon stocking cap (the thinner, the better), some weave thread, scissors, a blow dryer, and got2b glued gel.
*Make sure that you purchase a nylon cap that's lightweight, breathable, and has one layer of fabric (instead of two). Also, you should purchase a cap that is as close to your skin tone as possible, as it will show wherever your wig is parted.
Here's how to do the bald cap method
Tip 8: Cut the Lace Along Your Hairline
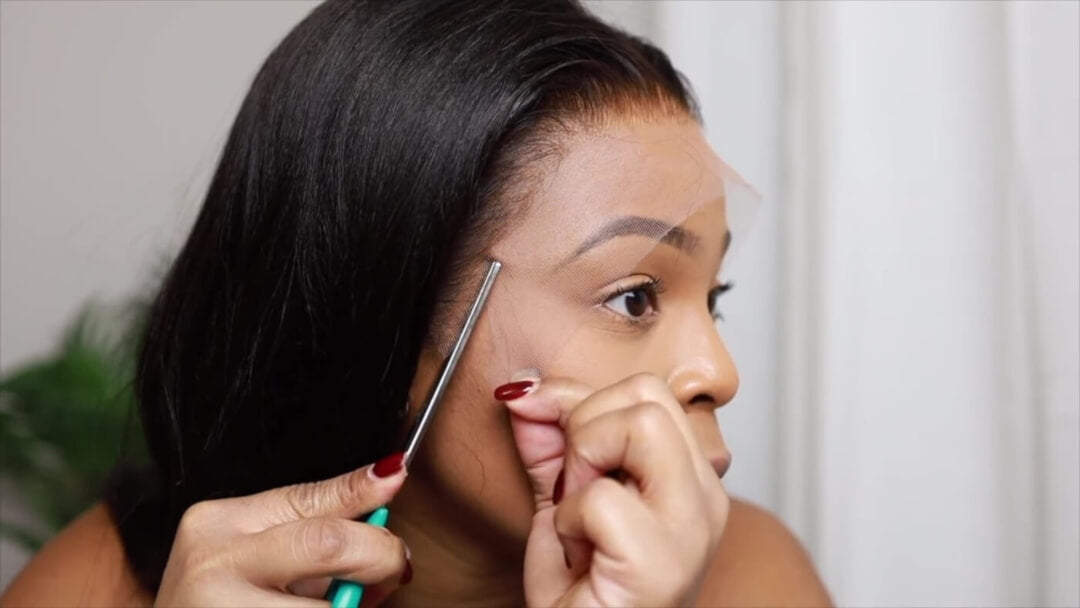
Cutting the lace along your hairline is very straightforward, but some still have trouble. To minimize the chances of lace or wig damage, follow these steps to cut the lace the right way.
Put your wig on your head and use a white eyeliner pencil to trace your natural hairline. The line should be about ¼ of an inch in front of your natural hairline.
Then grab some hair cutting shears, nail cutting scissors, or an eyebrow razor and cut the lace in the shape that you just drew. Remember to cut the ear tabs and avoid cutting the adjustable elastic band.
For detailed step-by-step instructions for cutting your lace, read this article on How to Cut Lace Off a Wig.
Tip 9: Melt Down the Lace
Another important step you can take to make your wig look natural is melting down the lace. Melting down the lace helps the lace blend in with your skin so that there’s no visible line between your wig and your skin. Here’s what you need to do to melt down your lace:
- After cutting away the lace along your hairline, move the wig back, exposing the front of your wig cap or your natural hairline.
- Starting in the middle of your hairline, apply your wig adhesive (got2be glued gel or Bold Hold). Wait a few seconds for the adhesive to become tacky.
- As you bring your wig forward, press the lace edge into the wig adhesive. Secure the lace to the adhesive with the opposite end of a rat tail comb. Spread the lace gently with the comb to ensure it sticks.
- Repeat the previous two steps on the other side of the lace hairline.
To melt down lace, follow this detailed instructions
Tip 10: Leave Some Baby Hair Out
Leaving out and styling your baby hairs can go a long way in making your wig look natural. Many wigs come with pre-cut baby hairs. But if your wig does not come with them, you’ll need to cut them on your own. Here’s how to do it:
- Put your wig on your head or on a canvas mannequin head.
- Smooth some styling mouse on the front of your wig along the hairline. Three pumps should be enough. Then brush all of the wig hair backward.
- Use the straight end of a rattail comb to part out your baby hairs. Part them really close to the hairline (a millimeter or two away). Most people create baby hair around the temples, along the sideburns, and at the widow’s peak.
- After parting the baby hair out, brush the rest of the hair backward and use tweezers to pluck a few hairs here and there.
- Then cut your baby hairs using an eyebrow razor. Hold the baby hairs taut as you move the razor in a diagonal motion. You decide how short you want your baby hairs to be, but about 1 inch is average.
- Apply some gel to your baby hairs. Use your edge stylers or toothbrush to create swoops wherever you want.
Tip 11: Create a Natural Part
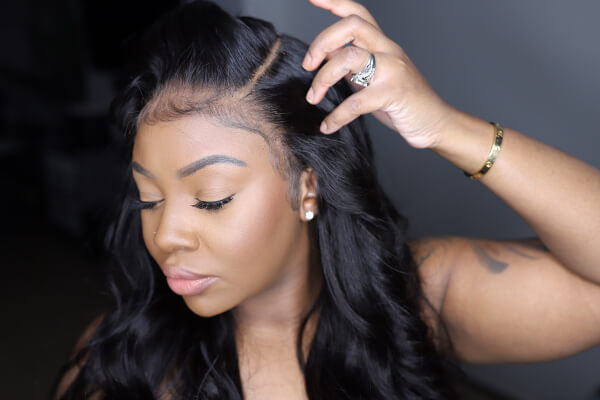
Creating a natural part is a non-negotiable step in making your wig look natural. If your part is not the right color or isn’t plucked properly, it’ll give away the fact that your wig isn’t your natural hair.
To create a natural part, part your wig where you want your part to be, using the straight end of a rat tail comb. If the wig doesn’t have a pre-plucked part, you’ll need to create one with your tweezers. Pluck one hair at a time as you move from the hairline to the end of the part. Plucking in rows helps to prevent a part that’s too wide.
If one row of plucking isn’t enough for your wig and your overall look, pluck another row of hairs in the direction of your part. You probably won’t need to pluck more than two rows of hairs.
Tip 12: Blend with Makeup
Now that your part and baby hairs are done, it’s time to take things a step further and apply some makeup to the parts. All you need to do is grab a powder foundation or concealer that’s the same color as your skin and apply some of it to the part. You can apply it directly to the part or on the underside of the lace. We recommend using a small makeup brush if you’ll be applying the makeup directly to the part, but you can use a large brush if you’re applying it to the underside of the lace. Don’t stop applying the makeup until it looks like your skin.
Tip 13: Opt for a Rooted Wig
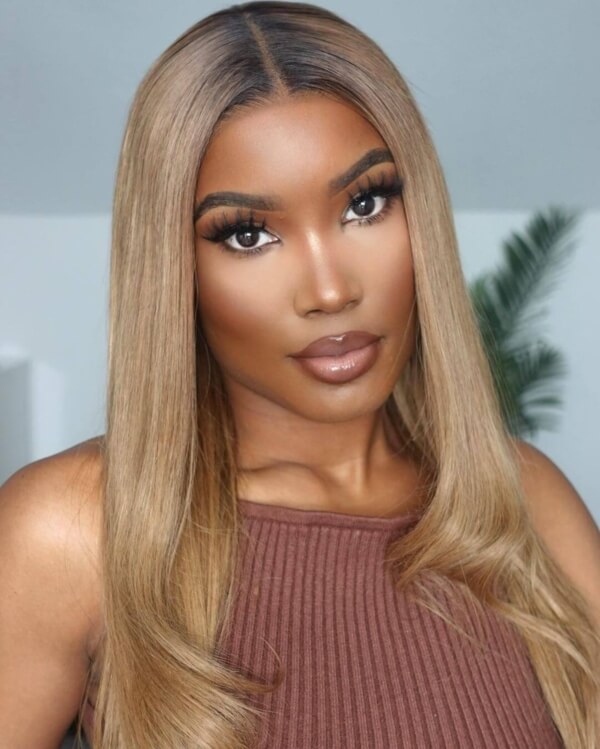
If you want to try out a colored wig, it’s best to choose a rooted one. A rooted wig is a colored wig that has dark roots and gradually blends into another color. It looks much more natural than a wig that’s pink, red, or ginger from roots to ends.
Tip 14: Try a Wig with Bangs
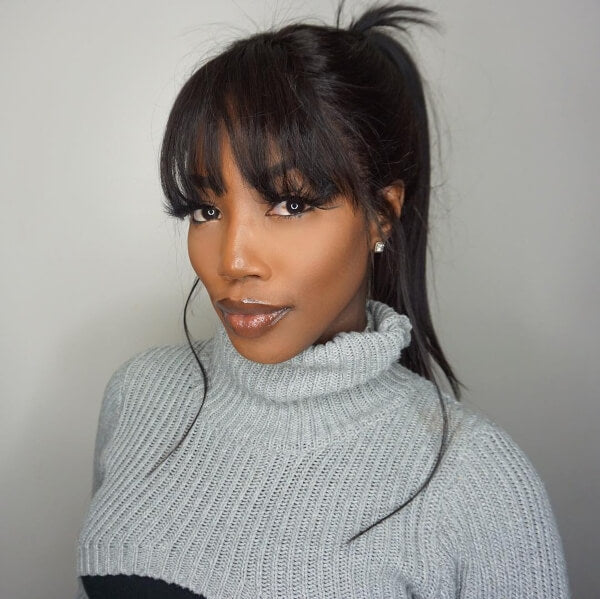
Wigs with bangs are great for hiding the hairline and making any wig look more realistic. So, if you want to bypass some of the steps mentioned earlier, go with a fringe. And if your wig doesn’t come with bangs, you can add some within minutes using hair-cutting shears. When you’re cutting your bangs, be sure to cut away a little at a time to avoid cutting off too much.
Tip 15: Style it Your Way
Make your wig yours! Style it in a way that makes it better complement your face shape and personal preferences. Give it a dose of personality to differentiate it from the rest
Learn more about how to style a wig
Tip 16. Maintain Your Wig Regularly
Wig maintenance is a very important part of wig ownership. It not only keeps your wig looking fabulous, but it also lengthens its lifespan. Here’s what you need to do to maintain your human hair wig:
- Wash your wig once every 7 to 10 uses. Depending on how often you wear the wig, this can be as often as once a month. Use shampoo made for wigs.
- Condition your wig after every wash and use a water-based leave-in to keep it moisturized.
- Store your dry wig in an enclosed container when not in use.
- Be sure to have more than one wig on hand, as you’ll need to give your go-to wig a break every now and again for maintenance. If you wear the same wig every day, you won’t be able to give it the care it needs to remain natural-looking.
Aside from that, recognize when it’s time to get a new wig. Every wig has a lifespan, and for human hair wigs, it’s usually around 6 months to a year. But if you wear your wig sparingly, it could last even longer.
Now You've Got All The Tips to Make Your Wig Look Natural
You can do many things to make your human hair wig look more natural. And anyone can do it. We encourage you to follow the information and tips in this article to transform any wig into a stunning, natural-looking unit. But if all of the steps still seem too overwhelming, you can always go to a professional wig stylist and have them complete all the customization for you.
Now, let’s hear from you! What is your secret to making a wig look real? Is there any tips we are missing? Share below in the comments!


That was very informative
Leave a comment